Affiliate Disclosure: This blog may contain affiliate links. This means that if you click on a link and make a purchase, we may earn a commission. However, please note that we only recommend products and tools that we use and genuinely like. We always prioritize our readers' best interests. By clicking on these links, you won't incur any additional costs, but it will help us keep this site running. Thank you for your support!
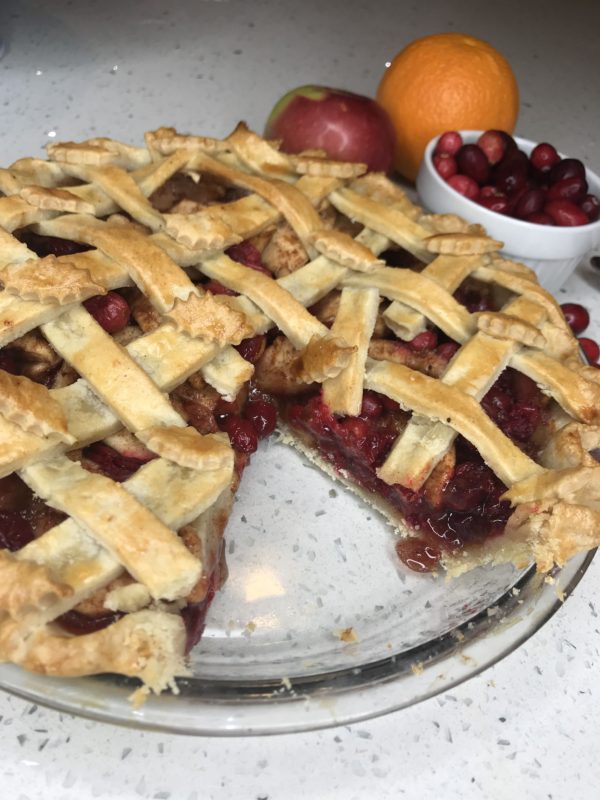
Traducir a EspañolJump to recipeIt is Cranberry Season you guys!!!! I think this is it, this year I am buying lots and lots of cranberries, I will wash them and freeze them so I can enjoy fresh cranberry desserts in Summer! My husband LOVES cranberries, and he loves pie! So, when I made this pie he loved me even more for like a week. Mind you, we are just 2 people and sometimes it is just hard making dessert for only 2 portions, either way, who would only want one piece of pie?!
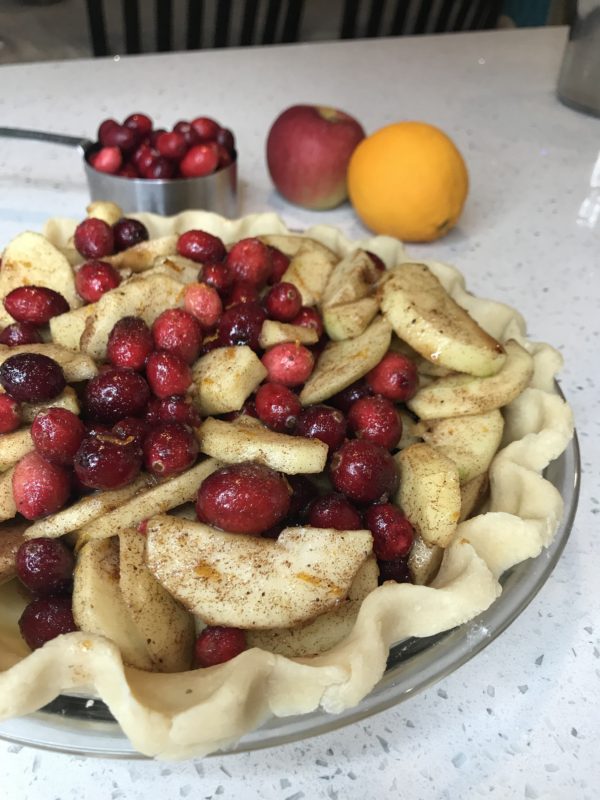
This recipe is a mix of love, apples, cranberries, and lots of not knowing how to decorate the top of it! I don’t know why, but I become very indecisive about it every time. I have seen so many beautiful pie designs…but, no matter how you decide to decorate this, it is a very very DELICIOUS PIE! I enjoy eating my pies warm, my husband eats them cold -straight out of the refrigerator cold – However, I feel it is so comforting to have warm pie….
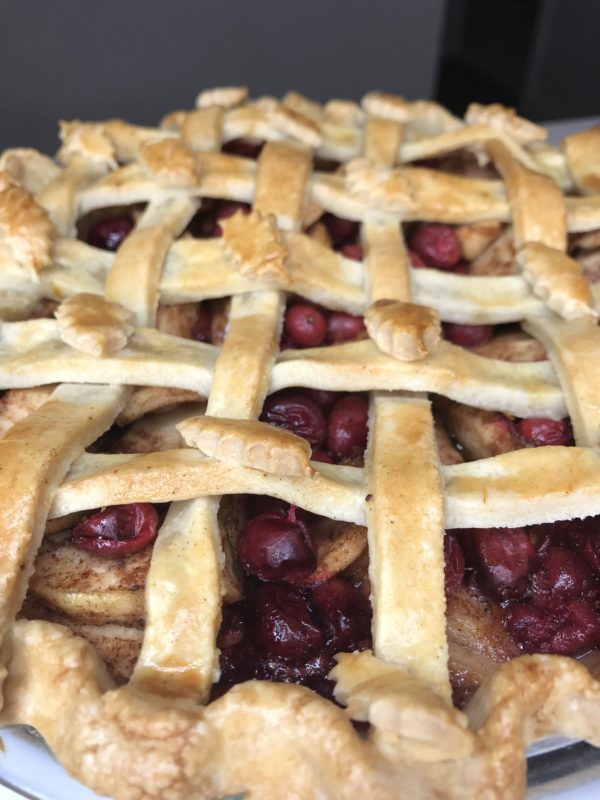
This pie took longer to bake than I expected. It was already 40 minutes and it was not browning!! But I was patient, as I knew this would be so so so good and left it around 10 min more (with my oven calling me every 5 just in case it started to brown too quickly). I am always happy to eat pie. Just remember to prep before hand, and to make sure you have all ingredients completed and fresh. There is nothing better than fresh Granny Smith Apples, and fresh cranberries. Granny Smith Apples are my favorites because of their tartness and because they hold their shape really good when baked.
For the pie crust, a food processor helps a lot. I truly disliked making pie crust using my hands or a fork, it took forever. With the food processor you can mix everything so quickly that it changes your baking life! I used to have a teeny-tiny food processor and did half of the recipe first and then the other half.
Ingredients
For the Pie Crust
For the Filling
- 3 large apples, cored, peeled, and sliced into 1/2-inch slices (measure about 6 cups)
- 1 and 3/4 cups fresh or frozen cranberries
- 3/4 cup granulated sugar
- 2 Tablespoons cornstarch
- 1 Tablespoon orange zest
- 2 teaspoons ground cinnamon
- 1/4 teaspoon ground cloves
- 1/8 teaspoon ground nutmeg
- 2 Tablespoons unsalted butter, cold and cubed
Egg wash: 1 large egg beaten with 1 Tablespoon milk
Instructions
- Prepare the pie crust recipe and chill on the fridge.
- To make the filling, in a large bowl mix granulated sugar, orange zest, cornstarch, cinnamon, nutmeg and cloves. Add apples and cranberries and mix it together until everything is evenly coated. Set aside.
- Preheat oven to 400F.
- Work with one of the dough discs first while keeping the second one on the fridge. On a floured surface, roll out the dough into an even circle, lifting up and turning it around as you roll. To have a uniform thickness always roll out starting from the center of the pastry. You can measure if the circle is big enough by putting your pie plate upside down on top of your pastry circle, the dough should be just a bit larger than the pie plate.
- Being careful, lift the dough into your pie plate. Tuck the edges with your fingers and design you prefer. Place filling into the prepared crust leaving out any excess liquid in the bowl. Dot the filling with the small butter pieces. Stick in the refrigerator until the top crust is ready to be placed.
- For the lattice: roll out second chilled dough into a large disc, and with the help of a sharp knife or pizza cutter, cut strips around 1-2 inches wide. Remove pie from the refrigerator and thread the pie strips over and under, pulling the strips back as you place new ones to complete the weave. You can YouTube this, there are many many really good tutorials. Seal the edges of the strips with the bottom of the pie crust and use a sharp knife to trim the strips. In this step you could also do a full layer of pie crust on top of the pie, making small slits with a knife to let the steam out.
- Brush the top of the pie crust with the egg wash, this will make it nice and golden. Place back in the fridge if your oven is not completely heated yet.
- Place the pie onto a large baking sheet and bake for 20 minutes. Then, turn the temperature down to 350F and bake for an additional 35-45 minutes.If your edges are browning too quickly, place a pie crust shield on top, if you don't have one, you can cover the edges with foil.
- Allow the pie to cool completely for a couple of hours before serving to allow the juices inside to thicken. Serve with whipping cream or vanilla ice cream.
Pie Crust recipe inspired by: Joy of Baking and Pie Filling adapted from: Sally’s Baking Addiction
